new zealand: Tongariro alpine Crossing
Tongariro National Park, Mt Ruapehu / 19.4kms one way / 7-9hrs one way / Intermediate
The crossing located in the Tongariro National Park, is one of the best hikes - not just in New Zealand, but in the entire world. This 19.4km hike is very accessible, with a few steep ascents and one long descent - which requires good physical fitness levels. As it is so easy to reach, it also means it can be extremely crowded. However don’t let it put you off seeing one of the most unique landscapes you will most likely ever witness. And as an added bonus, you are able to even see the locations used in the Lord of the Rings movies, such as Mt Doom.
The hike will take between 6-8 hours depending on your pace, and fitness levels and the amount of people on a track. There was an option to climb Mount Ngauruhoe and Mount Tongariro, however these sights are now marked as sacred places and no longer accessible. The change in elevation of the crossing is +/-1196m.
The Tongariro Alpine Crossing is not a circuit trail, which means you will be starting and ending at a different place. It is up to you which way you want to hike, however you need to keep in mind the transfer options. There are regular shuttles in place running throughout the day, which you are able to book, either for dropping off or picking you from the park. If you are using your own transport, there is also an option for dropping off to your vehicle after the hike, or relocation of your vehicle while you are completing the crossing. This is one of the reasons you will want to start early, so that you can make sure you are finishing prior 4:30pm. There can also be high number of people waiting for the shuttles towards the end of the day. During the busy seasons such as summer, it is a good idea to book transportation beforehand to avoid missing out due to full vehicles. The cost of the shuttle is roughly $40 NZD per person if you are transferring within the park area.
Hike
I started the hike at the Mangatepopo car park, south side of the park at 7am. It was a chilly, yet sunny morning - and already crowded as people were still coming in. A last check of the gear, and then it was time to experience this highly anticipated trek.
The first section took around half an hour with a steady incline while enjoying the rays of sunshine through the alpine vegetation, until it started to change to more volcanic, with big boulders and dark, black soil. This marks the start of the hardest part of the hike – a steep and tiring climb and big steps towards the Red Crater. I took little breaks to catch my breath, and as importantly, admire the ever stretching views of the National Park, which kept on changing the higher I got.

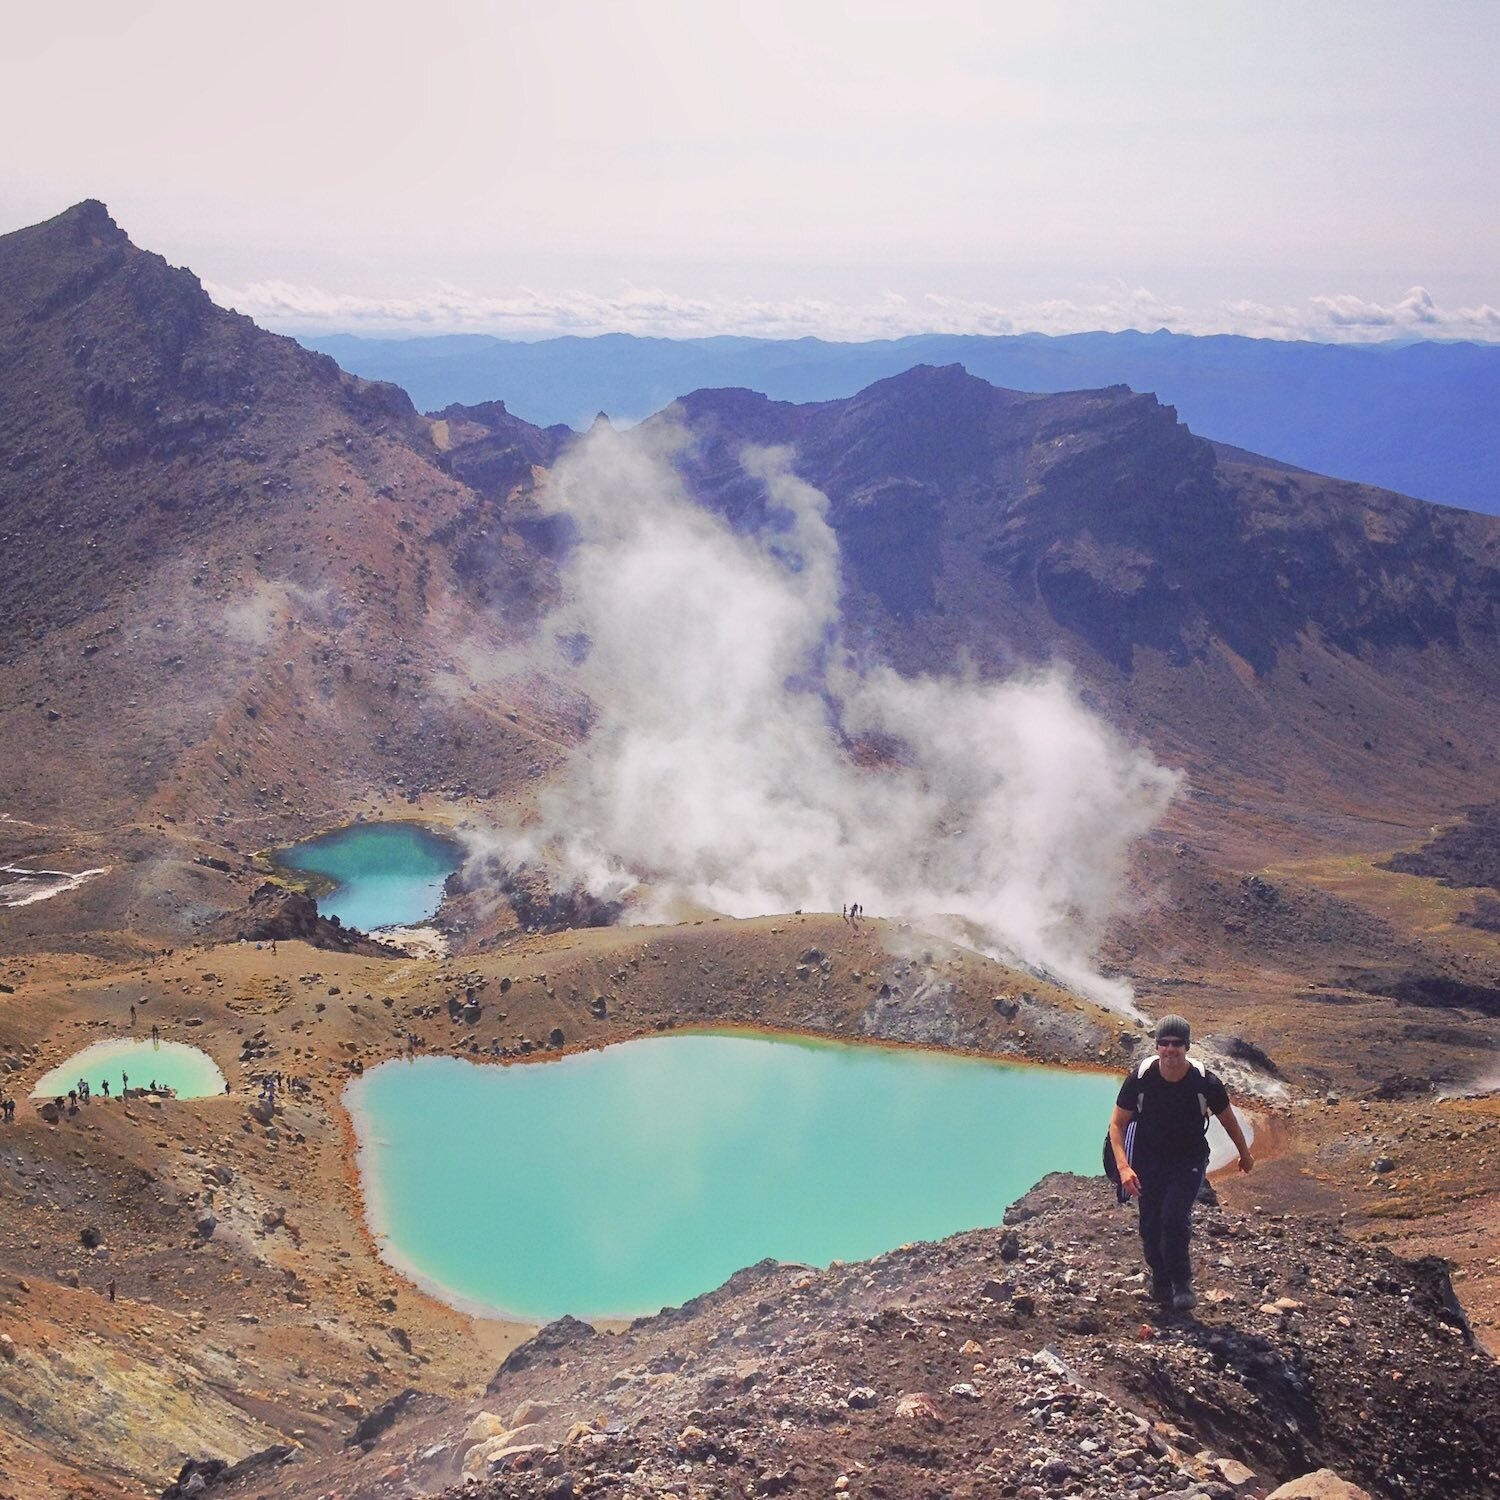
Once reaching the highest point of the crossing I was treated to a 360 degree view of the entire National Park. This was truly a feast for my eyes - the Red Crater and Emerald Lakes, Mt Ruapehu, Mt Ngauruhoe and Mt Tongariro, as well as the Blue Lake. I spent extra time to explore on this section, which was flat - and took photos of this dramatic landscape. I wasn’t prepared in my wildest dreams even thou I was familiar from the photos I had seen before. The steam rising from the ground reminds me of being in the middle of an active volcano park.

descent
This was a very relaxed part - passing the thermal pools. I always enjoy descending in loose gravel and get a change to practise my skiing skills. It’s fast, yet I also find it being gentle on the legs and joints. I could smell the overpowering smell of sulphur, and see the white steam rising from the ground, as I was reminded several times via warning boards to stay on the path - this was after all, volcanic grounds. Steaming Te Maari Crater is a reminder of the volcano that erupted in 2012.
The last few kilometres is not hard, but tiring and painful – especially if your hiking boots or shoes are not a good fit. I reached the Ketetahi car park in no time, and catch the pre-organised shuttle to Mangatepopo, where I left my car at the beginning of the hike.
I wished I would have organised for someone to drop my car here, so that I would have been able to take off straight away - for a well-earned dip in a spa and recall the last 6.5 hours. It’s a good, perfect day hike, which will leave a big impact for years to come.
quick tips:
Check the weather for the national parks, again and again.
Plan well, allow time to complete the trek, and let someone know about your plans, even thou this is a busy track.
This is an active volcanic area. Therefore eruptions are possible at any time, and without any warning. It’s good to check GeoNet to know what to do in those situations. The same website also gives information on the latest volcanic activity around New Zealand.
There is no water on this highly exposed trek, so take roughly 1.5-3 litres of water and sunblock in all seasons. As weather can change quickly, other equipment worth taking is a waterproof jacket and pants, warm layered clothing, hat and gloves and a head torch. There are toilets along the sometimes no paper, so bring your own.
Take food and snacks to keep your energy up. Just remember to bring ALL your rubbish - including food scraps - back with you. It’s a great practice to learn, no matter where you hike, to support sustainable activities, as well as preserving nature.
Keep your pace up on the first third of the trek to Soda Springs. It is a steady, hard part of the trek with constant incline. But don’t worry, you aren’t missing much of the sights. This allows you to have more time to see the main sights.
Hiking boots are not required. You can do the hike with athletic shoes but make sure they have good support and fit - as the descent is long. There is nothing worse than being uncomfortable during the decent. The track is very rugged at times with steep scree sections - so it’s better to have strong, rigid footwear. Definitely no sandals.
For a winter hike make sure you have crampons and an ice-pick. Alpine skills and experience are essential. If you’re not familiar with how to use that gear, make sure you go with a tour or have a guide - or choose another track. Check out the DOC site if you are still thinking of doing it. There are also a few contacts on the site to find experienced guides.
As always, it is good to have a map and cellphone. Even thou the trail is pretty straightforward and well marked, you are expected to stay on marked paths. It’s better to be safe than sorry.
For further information and quick tip, click here to help with your plans.
Be amazed!